
Grille Lights vs Surface Mount Lights for Emergency Fleets
By UNIT SIGNAL ·
Choose a grille light position when the vehicle needs a forward-facing warning source and the grille opening leaves a clear view of the lens. Choose an exposed surface mount when you need another viewing direction or an installation that is easier to reach and verify. The terms overlap. A surface-mount lighthead can be installed near the grille, and a grille installation can use a bracket or a purpose-built opening. Start with the viewing direction and the actual panel, then select the hardware.
Compare the mounting positions before comparing products
| Position | What to check first |
|---|---|
| Behind a grille opening | Check slat depth, line of sight, space for the bracket and access after reassembly. |
| On or near the front face | Confirm a stable mounting face, attachment method, connector clearance and access for sealing. |
| On a side or rear panel | Set the intended approach first, then check orientation, panel shape and any movable equipment. |
Do not assume a front-facing module covers crossing approaches just because it looks strong from directly ahead. Draw the required approaches on a vehicle sketch. A front warning location, an oblique approach and a vehicle’s side can each need a different evaluation position. Mark where an existing lamp, body edge, grille slat or accessory could hide the LED face. This gives the supplier a clear reason for the proposed housing and orientation.
When a behind-grille position works
Behind-grille mounting may preserve a clear exterior surface and protect the housing from some direct contact. Have the upfitter check the real opening, including the depth and angle of the grille as well as its width. A clear line of sight in one photograph can disappear from another approach. Place a sample or dimensioned template where the light will sit and photograph it from the relevant directions. Check again with the grille, covers and trim installed.
Space behind the grille may already be used by cooling equipment, sensors or other vehicle systems. Ask the vehicle upfitter to review where brackets and harnesses can be placed, along with access for installation and future service. Review the applicable body-builder guidance for the vehicle. Write down whether the front fascia has to come off to replace the light, and whether connectors can be disconnected without reaching past hot, moving or restricted parts.
When an exposed surface is easier to specify
A body panel or bumper face can make the mount and lens easier to inspect. It also gives the upfitter more options for side and rear warning positions. Evaluate the surface against the approved gasket and bracket. A shallow curve may look flat in a photo; the mounting template and a side view make the difference easier to see. Ask where the harness exits, how much room the connector needs and whether the fasteners can be reached from behind.
Decide who can authorize drilling and where holes are permitted. Check what is behind the panel and whether the mounting surface can support the hardware. A bracket can provide another location when the panel cannot be used directly, but the bracket needs its own required clearance, structure and orientation. If the vehicle has a hinged compartment, bumper step or moving equipment, review both travel and work positions. Leave usable space for cleaning and inspection.
Use two real housings to develop the comparison
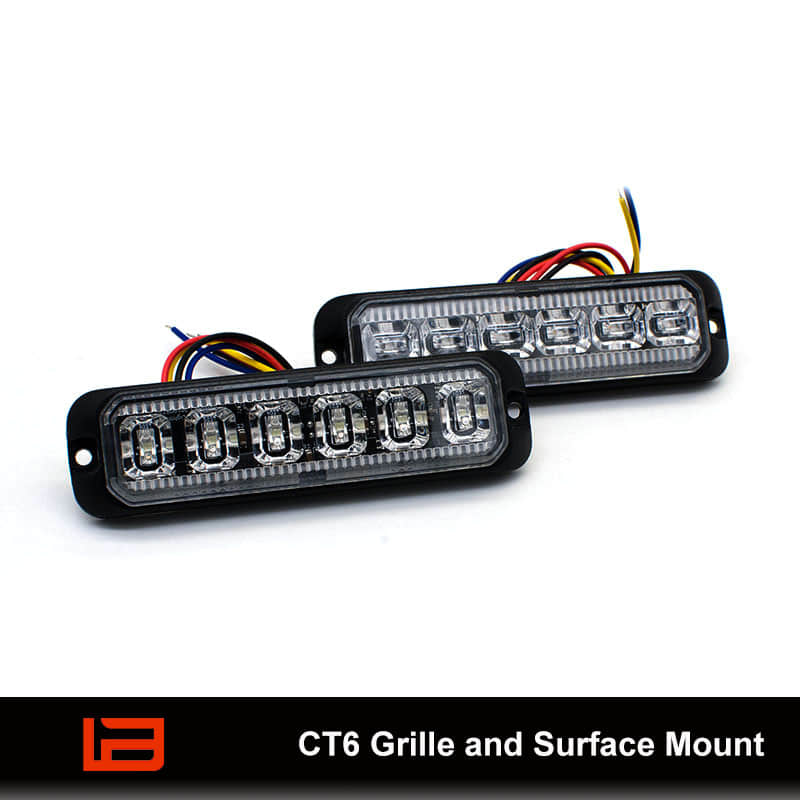
The CT6 grille and surface mount light is listed as a slim surface-mount module with a 10–30 V DC input. It makes sense to evaluate where the light face needs to sit close to the exterior panel. The H6 hood or L-bracket mount light lists a 10–30 V DC input and hood or L-bracket mounting. It gives the upfitter another mounting arrangement to evaluate where a separate bracket fits the job.
Compare the actual dimensions and mounting drawings for each shortlisted version. A narrow lighthead may fit between trim pieces, but its connector may not pass through the same opening. A bracket may clear the panel edge but extend into a service area. Ask suppliers to identify the housing, hardware and connector in their proposals rather than sending a general product picture. Choose the configuration that fits the intended position and service strategy.
Plan power, trigger and sync by mounting position
List the left front, right front, side and rear positions separately. Add the required color or signal function, control input and any synchronization requirement. Product variants in the same family can use different wire functions. Request the wiring diagram for the exact version, and confirm which colors, patterns and input modes the quote includes. If an existing controller is involved, provide its part number and describe the desired behavior in terms of what the operator selects and what the lights display.
Have the installer identify the supply point, cable protection and grounding method from the product and vehicle documentation. Plan the route away from heat, sharp edges and moving equipment. Where the loom enters the cab or body, identify who supplies the pass-through and how openings will be protected. If two positions are intended to flash together or alternate, check the approved pairing and setup on the first build. Do not infer sync compatibility from a shared voltage rating or from a similar wire color.
Translate the vehicle drawing into quote lines
Prepare one line for each installation position instead of asking for a pair of generic front lights. Useful fields are vehicle and trim, left or right side, installation face, available width and depth, lens orientation, required warning function, lead length and bracket. Attach a photo with the intended location marked and another with the trim opened if it is safe to obtain. If a position uses a different wire route or needs a different bracket, give it its own line.
Suppose the first vehicle has an open grille and a second variant has a different fascia with less depth behind it. Treat the two layouts as separate samples initially. A front installation from the first variant may sit in the wrong plane on the second. An exposed surface or a different bracket can solve the fit issue, provided the resulting warning direction can still be demonstrated. Trial both layouts on a representative vehicle before ordering a common bracket or harness for the fleet.
Ask the supplier to identify any change in the number of brackets, connectors or replacement parts between the two quotes. Agreement on the lighthead alone can hide installation work in the price comparison. The written quote should tell the buyer which parts come with each module and which the workshop needs to provide. The upfitter can then compare installation effort alongside hardware cost and keep an accurate spares list.
Evaluate visibility after the vehicle is reassembled
Set up an evaluation in a controlled area with observers at the intended approach points. Use daylight and other relevant working conditions for the trial. Observe the chosen positions with the vehicle reassembled, and with any steps, lift gates, racks or doors in the positions that matter for the job. A short video taken from each observation point documents what the upfitter saw without claiming a measurement of optical performance.
Then confirm the normal vehicle functions affected by the work, check the mount for access and compare the finished harness against the accepted drawing. Record the light revision, bracket, wire route and any programmed patterns. If the vehicle group uses more than one bumper or grille style, check each relevant variant before ordering common hardware. Keep a copy of the mounting details with the spares list for the service team.
Questions to answer before placing the order
Can I use the same module on the grille and the side?
Sometimes. The mounting drawing, permitted orientation, optics and available hardware must suit both positions. Treat them as separate locations in the RFQ even if you prefer to use a common part number. A shared module simplifies spares only when the approved installation can be repeated at each position.
Does a weather rating cover where the loom enters the vehicle?
The rating applies to the product and conditions described by its test or instructions. The cable connection, added holes and vehicle pass-through are installation details that need their own review. Ask what is supplied with the module and what the upfitter will specify and protect.
What if the grille blocks the preferred position?
Try a different approved position before picking a more powerful model. A different bracket or forward-facing surface may improve the line of sight without changing the whole package. Evaluate the new location from the required approaches and check the vehicle’s sensors and other equipment again.
Shortlist models and send the mounting brief
Browse the grille and surface-mount warning light range. To discuss a fleet fit-up, send the proposed mounting positions to UNIT SIGNAL with vehicle details, photos, available space, supply voltage, required colors, quantities and destination. Include the exact model of any existing control equipment if the lights must be integrated with it.