
How to Match an Emergency Siren and Speaker
By UNIT SIGNAL ·
Match an emergency siren amplifier to a speaker by the approved load, power rating and speaker configuration. Then verify the vehicle supply, control interface and mounting position. Two items both described as “100 W” can have different impedances or wiring requirements. Use the amplifier and speaker documentation for the exact revisions to decide whether a pair can be quoted and installed together.
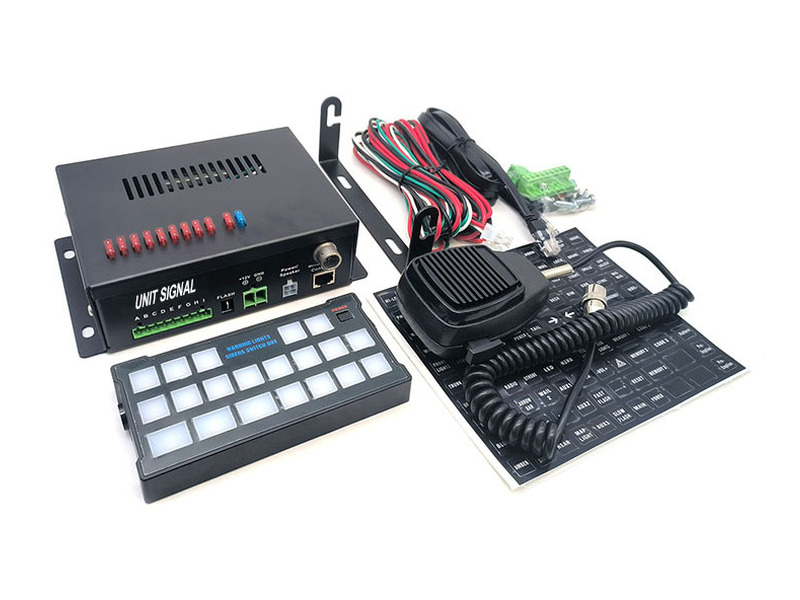
Read the amplifier output before choosing a speaker
Start with the amplifier part number and revision. Identify the allowable speaker arrangement, the nominal impedance it is designed to drive and the rated output under that arrangement. Some amplifiers are intended for one speaker; others support specific multiple-speaker configurations. Match the arrangement shown in the manual. A family name, the number of pins in an output connector or a headline wattage does not establish which speakers it supports.
Check the speaker’s own part label or documentation. A housing may be available in several driver variants with the same outside dimensions. Record the nominal impedance in ohms and the power rating in watts. These values describe different characteristics, so a power match alone cannot resolve the load requirement. Do not treat a measurement taken with a basic meter as a replacement for the nominal impedance or for the amplifier manufacturer’s pairing instructions.
| Item | Acceptance detail |
|---|---|
| Amplifier supply | Vehicle supply, approved electrical connection and protection instructions. |
| Speaker output | Allowed speaker count, nominal impedance and rated load arrangement. |
| Speaker variant | Supplier part number, rated power, nominal impedance and bracket. |
| Controls | Head, microphone, supported tones and any separate lighting interfaces. |
| First installation | Approved drawings, functional acceptance and any required acoustic records. |
Use actual variants to screen the pairing
The CJB-100PN siren lists DC 12 V, 100 W and 11 Ω. The SK02 100 W speaker is listed in 6 Ω, 8 Ω and 11 Ω versions. Those published numbers point to the 11 Ω version as the one to evaluate against the CJB-100PN’s listed figures. Ask the supplier to confirm the exact pair, bracket and harness on the quotation before an order is released. Do not substitute another SK02 impedance because it has the same housing or wattage rating.
If the project needs two speakers, ask for the amplifier manufacturer’s approved load arrangement before deciding how to wire them. Connecting two drivers changes the load seen by the amplifier. It also affects polarity, service and the conditions under which a test record might be relevant. Federal Signal’s e-Q2B siren manual specifies a single 100 W speaker for the e-Q2B-100 and two 100 W drivers for the e-Q2B-200. Use the wiring diagram for the exact amplifier in your vehicle.
Keep the vehicle input separate from the amplifier output
Vehicle supply voltage is an input to the amplifier, while the speaker load is the output the amplifier drives. Confirm the supply available to the siren, the expected operating conditions and the approved point for connection. A 24 V vehicle may need a different amplifier or an approved interface for a 12 V unit. Ask the installer to check the proposed solution against current demand, vehicle requirements and the equipment manual.
Request a matching amplifier diagram and a harness or connector list. Ask for the specified power protection, the relevant connectors and enough installed cable length for the chosen location. Document any existing equipment that must stay in place. A compatible load can still be a poor retrofit if the existing harness, mounting access or controller does not meet the requirements for the proposed amplifier.
Evaluate the acoustic opening and the service envelope
Use photos and measurements of the final vehicle layout, including mount depth, the thickness or location of the intended bracket and room to reach the cable. Check what will sit in front of the speaker after trim and equipment are installed. An available cavity may provide a different opening from the one used in the product’s published tests. Ask the upfitter to review nearby equipment, sensor and airflow restrictions, service access and the vehicle’s approved mounting arrangements.
Record which part can be reached from outside the vehicle and what has to be removed for maintenance. In a specification for several vehicle variants, compare the space behind the bumper or grille on each variant. Specify the actual bracket in the parts list so another workshop can reproduce the installation without improvising the orientation or fastening method.
Specify control functions without making them speaker requirements
Record the tones and operating states the driver needs, plus any PA function, microphone or control head requirements. If the siren controller is also intended to control lighting, list those outputs and the required switch behavior separately. Verify the supplied parts and, where applicable, the interface to other equipment already in the vehicle. A suitable speaker does not add a missing amplifier tone or a control option.
Ask for any required acoustic or market-specific records to identify the exact amplifier, speaker, mount and test setup they cover. A quoted sound level is useful for comparison only when the distance, orientation, tone and other conditions are understood. Where destination or fleet requirements apply, have the responsible reviewer check them against the proposed configuration. Avoid accepting a broad claim about a product family in place of records for the equipment being purchased.
How to compare a retrofit and a new-build offer
For a retrofit, list every part the fleet intends to keep, including the siren head, amplifier, speaker and harness. Record which item failed and which component labels the workshop can read. An approved pairing for a new build does not automatically reuse a legacy harness or control head. Ask the supplier to identify individually what can stay and what the new package needs so the installed cost can be estimated.
For a new build, ask for one line item or documented option that identifies the complete combination. The record should include amplifier and speaker part numbers, load arrangement, mounting drawings, compatible controller and required connection accessories. If price is provided in separate lines, state which components are needed for the intended setup. This prevents an amplifier-only quote being compared with a package that includes the speaker, harness and control head.
Agree what happens if the requested speaker variant is unavailable. Require the proposed substitute to come with its impedance and power information and an explicit compatibility review. Check whether the bracket, acoustic opening or connector changes before accepting an alternate. In mixed fleets, a spare speaker should be labeled for the system it belongs to so the same-looking variant is not installed by mistake.
Before the first vehicle is handed over, ask the workshop to give the fleet a short record it can use later. It should include where the label can be read, who holds the wiring documentation, and how to identify the correct replacement without dismantling more of the vehicle than necessary. Keep that record with the approved equipment combination and the location of the control head and protection devices.
Make the first-vehicle check repeatable
- Confirm the amplifier and speaker variant labels, harness and mounting hardware against the parts list.
- Have qualified installers inspect the connection and mounting against the applicable documents before energizing the system.
- Verify the controls, tones, PA and any lighting interfaces in a controlled setting using the equipment instructions and appropriate sound exposure precautions.
- Record the accepted equipment, wiring revision and any project-specific acoustic review or test results.
Keep a pairing record with the vehicle and spares documentation. When replacing a speaker, check the new part number and impedance rather than buying by physical appearance. If a change affects the amplifier, load configuration, mounting or controls, decide which acceptance checks must be repeated before the replacement is treated as equivalent.
Two questions to ask about replacements
Can I retain the existing speaker when replacing the amplifier?
Identify the existing driver’s model, impedance and ratings, then ask whether the proposed amplifier supports that exact configuration. If the driver label has worn away, look for reliable purchase or installation records before approving the pairing. Do not assume the existing harness identifies the speaker load.
Will a different speaker make the same siren louder?
Power rating alone does not answer that question. Compare the approved pairing and reliable acoustic data under comparable conditions, including the proposed mount. A change that sounds different can still be unsuitable if it does not match the output requirements or the vehicle’s installation constraints.
Request a quote for a defined system
Review the electronic siren range and siren speaker options. Send UNIT SIGNAL the amplifier or vehicle specification, supply voltage, speaker count, available mounting space, required controls and quantity. For a retrofit, include the existing part numbers and the documents the replacement must be evaluated against.